..but at least my abs are rockin ;) My diet has been mostly the same...with the addition of some occasional cheats. I still basically eat everything I want to, I just incorporate more vegetables and fruits into my day. I don't drink soda, AT ALL. I don't eat fast food, except the occasional Wendy's, Chic-fil-a or Subway. When I make my plate, half of the plate is vegetables, 1/4 starch and 1/4 meat. I also eat all of my vegetables before I move on to the starch and protein. I incorporate fruits and vegetables in to EVERY meal, including breakfast. I recently made a Veggie Fritatta that was freakin delicious! I plan on having that recipe to you guys soon. Making sure I eat a variety of fruits and vegetables has been helpful in terms of digestive health & bathroom-going. [T.M.I?]
My next diet goal is giving up white breads/ pastas, gearing towards more whole grain choices. I also plan on giving up refined sugar and flour. Wish me [add my wallet] luck!!
Away from school I have NO access to a gym, so the fact that these workouts are so readily available on FB makes life SO much easier. I was really worried about gaining all of my weight back over the summer, but I've been able to maintain doing these in conjunction with the daily workouts I've previously posted.
This first workout kicks my freakin BUTT.
By the 3rd set, I'm usually like FORGET THIS!!
But then I think about my goal of maintaining a healthy lifestyle and I continue to push myself. I find that stretching in between sets makes it a little easier to bear and helps to reduce sore muscles the next day.
This next one isn't really a workout, just a series of moves you can add to any workout you're doing. I usually do 3 reps of each. I add these moves to the Monday and Thursday workouts.
This last one is my absolute favorite cause it's such a challenge! I usually do it when I'm watching Dr.Oz...lol. I've been able to complete it before the show comes back, but when I first started doin it, it was definitely a challenge! I encourage all of you to attempt this, you'll find that it actually isn't hard at all! How to do a burpee How to do a Russian Twist
As aforementioned in my Wash Day Rambling post, my humungo Spinach raviolis were made but had not yet been cooked for human consumption.
Well, I'm here to tell you that they HAVE been cooked, and were pretty freakin tasty too ;)
This inclination to make ravioli came about after I had bought a bag of spinach & was running out of ideas of what to make. I used it in omelets and rice, served it on the side or in salad but i wanted to do something different! Since I bought those won ton wrappers and saw that I was gonna be able to make ravioli w/ them, it was over. Spinach ravioli HAD to be made!0_0
This is another one of my simple recipes that can easily be cooked by anybody who may know their way around the kitchen a lil bit..but if not, I hope I make it easy enough to follow!! These can be made to be used the same day, or be frozen for future use, like I did. If you DO decide to freeze them, make sure you freeze them on a flat surface like so ---->>
BEFORE you put them into a container to freeze because if you don't they will all stick together and create a horrible mess and all of your hard work will be ruined..and you don't want that, do you? No. Didn't think so.
Here it goes...
Spinach Ravioli
Yield: 3-5
1/2 pack Nasoya Won Ton wrappers ( I got them from Shop Rite for like..$3)
4 c. Fresh Spinach, washed & drained
1 tbsp. Garlic, minced
2 c. Ricotta cheese
1 Egg, beaten
1 c. Parmesan cheese
2 tbsp Salt
1tbsp Pepper
1/4 tsp Nutmeg
1 egg + 1 c. water for egg wash.
1/4 c. flour for tray
Separate out the won ton wrappers, discarding the torn ones. I used 30.
In a pot of boiling, salted water, blanch your spinach until wilted, strain, and then place the spinach into a bowl of ice & water to stop it from cooking any further.
Remove the spinach from the water and wring as much of the water out of it as you can. *This process is done easiest with cheesecloth, but if you do not have any on hand, fold the spinach up in 2 coffee filters, 2 paper towels, and an old, CLEAN wash rag, [preferably one you don't care for too much] and wring it out.
Remove the spinach from the cloth and give it a rough chop.
Combine spinach w/ egg, ricotta, Parmesan, salt, pepper and nutmeg and stir until fully distributed.
Wrap either a sheet tray, cookie sheet, or regular food tray in foil and spread flour onto the tray evenly. Lay out your won ton wrappers in 2-4 rows (depending on how big your cookie sheet/ tray is) and using a spoon, scoop a quarter-sized amount of filling and place it in the center of every other won ton wrapper.
Using either a brush or your finger, brush the egg wash onto the outer sides of the won ton wrapper, around the spot where you placed the filling.
Take the won ton wrappers that do not have any filling on them, and place over thee ones that do. In order to seal it, press your fingers around, not on, the area where the filling is and gently push outward, towards the edge of the ravioli. This will help push out any excess egg wash and remove any air bubbles. Repeat with all ravioli.
If freezing for later enjoyment, keep on tray and freeze. Once fully frozen, place into Tupperware and return to freezer.
If you can't wait to eat them, get a pot of boiling, salted water ready, drop a few of your ravioli in and cook until they begin to float, remove and serve with the sauce of your liking.
ENJOY!
Turkey Sausage w/ Garlic Basil Sauce
1/2 link Turkey Kielbasa,cut into 1/4in thick pieces
2 tbsp Garlic, minced
3 tbsp butter
3 tbsp flour
1/4 c. White Cooking Wine
1/2c. Veg stock
6 Basil leaves, chiffonade
Salt & Pepper to taste
Heat pan over medium heat.
Add sausage and sear on all sides until brown, but not burnt.
Stir in garlic and saute for 1 min.
Turn up heat, add butter until fully melted and then stir in flour. Cook for another minute or so- be careful not to burn.
Add wine and stir/whisk. The pan should sizzle alot when you do this, don't be afraid cause that's what you want. Cook for 2 mins or until the alcohol is cooked out.
Add stock and bring to a simmer.
Stir in basil and season with salt and pepper
Serve over ravioli
ENJOY!
The sauce didn't look how I wanted it to but...it was still good!!!
...we had alot of carrots in the fridge and I REALLY needed a reason to use my new immersion blender that I got for my birthday..
(it's sexy, right? ;) ) --->>
..so I was like, TA-DA! Carrot Soup!
Yeah, if only it were that simple.
I even got all fancy and made my own whipped cream [only cause the blender came with a whisk attachment] to put on top to create another layer of richness and flavor....mmmmm NOM.
*drools*
Sorry...
This recipe is freakin simple, it's ridiculous. I think I even forgot that it was on the stove for a second until I got a whiff of cinnamon in the air (Cinnamon? Yeah.)
Alright lovies, here it is!!
Kayla's Slam-Bam-Jammin Carrot Soup! <--- (I don't really call it that)
Yields: 6 servings
1 bag of Carrots, about 7-8 medium sized carrots total, medium dice
1 Onion, medium dice
3 cloves, Garlic, chopped
1 tbsp Canola Oil
2 tbsp fresh Ginger, either chopped or micro-planed/grated
1 tsp fresh Rosemary, chopped
1 tsp fresh Sage, Chopped
7 oz. Vegetable Stock
1 can Coconut Milk
1 tsp ground Cinnamon
1/4 tsp ground Nutmeg
Salt & Pepper to taste
Preheat pot over medium heat, add oil and saute carrots, onions and garlic together for about 2 mins or until onions begin to turn translucent.
Stir in ginger, rosemary and sage and continue to cook for another minute.
Add vegetable stock, bring to a boil and then reduce to a simmer. Cook until the carrots have cooked all the way through.
Turn off the fire, grab a potholder and prop the pot up using one hand*. Using the immersion blender, blend everything in the pot until no lumps remain.
-OR- If you do not have an immersion blender, use a regular blender or food processor, but DO NOT try to blend everything at once. Blend your soup in batches when using a regular blender/ food processor and DO NOT fill them all the way to the top. Once you've finished blending, return to the pot.
5. Bring to a simmer and gradually add coconut milk. If the soup is more thick than you'd like, feel free to add additional milk, cream, stock or water- whatever you prefer. I chose to thin it out with some more stock so that i wouldn't lose flavor.
6. Stir in cinnamon and nutmeg and season with your favorable amount of salt and pepper.
7. ENJOY!
*The reason you want to prop/ hold one side of the pot up with your hand before you use the immersion blender is to avoid splatters, and to allow easier blending.
This soup lasted me a week in the fridge, but it can also be frozen and reheated for whenever you want. Another plus to this is that it can also be enjoyed cold, so choose your preference and dig in!!
P.S. To make the whipped cream, get some heavy cream, salt and chopped ginger, place in blender (or use whisk attachment on immersion blender ;) ) and whip until stiff peaks are reached. Don't over whip it though, you don't wanna make butter! (or do you....?)
I just garnished with some scallions and julienned carrots that i roasted in the oven for about 5 mins.
Remember that oh, so BEAUTIFUL chicken I bought for $4 a couple of months ago??
Yeah. I did something special with that bad boy!
This recipe is type long in terms of ingredients, but not difficult at all!
I did this recipe for my practical exam and freakin blew my chef AWAY.
Yeah, ya girl knows her way around the kitchen..;)
WHAT YOU'LL NEED:
1 3-4lb Whole chicken
Rub:
2 tbsp Ground Cumin
1 tbsp Ground Coriander
2 tbsp Ground black pepper
1/4 tsp Grated Nutmeg
1/2 tsp Dry Mustard
1 1/2 tbsp Ground Cinnamon
1 tsp Ground Ginger
1 tsp Turmeric
1 tbsp Paprika
2 tbsp Kosher Salt
4 tbsp unsalted butter, room temp
2 Spanish [yellow] Onions
2 Garlic Heads + 2 cloves
3 Carrots
2 Celery Stalks
Stuffing:
1 Piece of ginger about the length of your thumb
1 sprig of parsley
1 sprig of thyme
1 bay leaf
1 tsp Peppercorns
Make sure you place your vegetables so that the chicken elevated evenly.
The first thing you want to do is get your vegetables ready. This array of vegetables is known as mirepoix, which is the combination of celery, carrots and aromatics to provide flavor and aroma. Mirepoix can also be used to elevate a roast during roasting and also provides additional flavor to the pan drippings to later make a sauce for your roast.
1. Rinse off your celery; cut the tops and ends off of your celery stalks and cut the stalks into 3 pieces. 2. Peel your carrots; cut off the tops and ends and cut the carrots into 3 pieces. 3. Cut the whole garlic head in half, the way you would cut a grapefruit. 4. Cut the onions in half, discard the outer layer, and cut the halves in half. 5. Set aside in roasting pan You don't want the vegetables cut too small because you don't want them to burn while the chicken is cooking on top of them.
Next, I got the aromatics I planned on stuffing inside of the bird (Parsley, thyme, Bay leaf, ginger, garlic, peppercorns) prepped and set aside. I didn't chop anything up except for the ginger, which i cut into 3 pieces.
Combine all of your dry ingredients with butter and mix together until fully incorporated.
Now it's time to prep the bird!!
If you've never worked with a whole chicken, don't be intimidated, it's not difficult at all.
Cut off the tail and discard.
Next, remove the wishbone.
Here's an instructional video on how to remove it. What I do is sit the bird on it's butt, open the neck and feel for the wishbone with my fingers. Once I feel it, I take my knife and scrape up against it to gently remove the meat that's covering it. When the bone is about 75% of the way exposed, I just run my fingers along the bone to remove any excess meat and repeat on the next side. Once it's exposed, I grab the tip of the wishbone and pull it out. Don't worry if it breaks on you, just take it out.
Once the wishbone is out, throw the wishbone in with the mirepoix.
Continue prepping the bird by cutting off the wing. ATTENTION: Don't do what I did and cut off the WHOLE WING Leave the drumette part attached. Throw the wing and tip in with the mirepoix as well.
See the part over to the far right-->> ??? Yeah. Leave that^ on the chicken.
....like so.
The next thing you want to do is rub your fingers right under the skin of the breast to make room for the butter you're about to shove in there!
Now, take a glob of the butter mixture and shove it up under the breast skin.
Once you get a good amount under there, use your thumb to push and evenly distribute the butter throughout the whole breast; repeat on other side. You can even try to get some butter in between the thighs for additional seasoning. When you feel as though you've stuffed enough butter in your bird, feel free to rub the rest of it on the outside. If you have none left, mix up some salt, pepper and curry powder to rub on it.
The reason you rub the butter under the skin is to provide moisture and additional flavoring to the breast. Knowing that this is usually the driest meat on the bird, the butter will baste the breasts in conjunction with the fat in the skin to give in more moisture.
It looks kinda crazy, but it's gonna taste AWESOME!
Stuff your chicken with the aromatics you set aside earlier.
Finally, truss your chicken, place it on your mirepoix and bake it at 350 degrees F, uncovered for 1 1/2 hours, or until the thigh meat reads 175 degrees F.
I don't have a pic of the final result (because they freakin ATTACKED it) but it was DELICIOUS! I hope you enjoy!! P.S. Do NOT Consume the aromatics you stuffed inside of the bird.
I woke up this morning and was like, "Hmm, I feel like making a workout video," ESPECIALLY since I've been neglecting my poor YouTube subscribers after not posting videos for YEARS and deleting the videos I used to have up there..it's all love though! =D
So check it out you guys..I worked freakin HARD on this video!! For HOURS!! HOURS!!!!!!!!
Here's the link to the Thursday Workout that I'm talking about..
I don't know how many of you have actually watched the documentary, "Super Size Me" by Morgan Spurlock, but it really disgusted me when I saw it. This man ate McDonald's 3x a day for 30 days straight and as a result, gained 24 1/2 lbs, had a 13% BMI increase, fat accumulation in his liver and steady stream of mood swings and other physical malfunctions. It took him 14 MONTHS to lose the weight it had only taken him 1 month to gain!! And even after that movie made it clear to the nation of what people are doing to their bodies DAILY, our country still continues to produce and promote things like the Bacon Sundae (Burger King) and would rather buy processed foods packed with salt and preservatives as opposed of making them from scratch.
The bottom line says: The other 85% is meat filler cleansed with ammonia which causes stomach and intestinal cancers.
Eating fast food makes me feel sluggish, makes me flegmy, and overall is just unsatisfying. I remember when I first came back from school for Christmas and my mom stopped at McDonald's to eat and I was so hesitant about ordering ANYTHING because of the stories my chefs had told us. I just simply got a McDouble and small fries and it was honestly, disgusting. I could taste every preservative in the fries...I could taste every ounce of sugar in the ketchup...so I just stopped eating.
Although fast food is cheap and easy, you have to realize that the ONLY reason why it's cheap is because it's cheap product. Do you REALLY think that they use ACTUAL Pork rib meat for the McRib? Do you honestly believe they use prime cuts of beef to grind to make those little brownish/grey patties?? And DON'T GET ME STARTED on Chicken Nuggets....
Being a college student, I understand the need for food you can just throw in your mouth and go, but you gotta realize that after you throw that processed meat patty slathered in ketchup in between two sesame seed buns..that it's doing horrible things to your body.
Now that I have more knowledge about food and the food industry, I always find it hard to believe that people would rather have people cooking for them rather than cooking for themselves. The people behind the counter don't care about your health or your well being, they're only doing their jobs- serving their billions of customers. But when you sit back and think about all of the disgusting preservatives, additives, meat filler and pesticides you're consuming just on that one burger ALONE, you'll find yourself having a change of heart.
I mean, look at the news..McDonald's JUST announced in February of this year that they're going to "end the use of pink slime in their burgers," but how many decades has McDonald's been doing this?? How many years have these corporations been pumping this disgusting additive into our food without us even knowing it? It's a shame that the ONLY reason why they're stopping is because they've been exposed and they don't want to lose their customer base! I find news like this extremely disturbing because even though they had that light shone on them about the pink slime, people still continue to consume their food without giving it a second thought.
I have a question for you guys....
Why do fast food chains have such a strong hold on us as a country?
Why is it that even when the disgusting truth is exposed to us, we just shrug it off as if it's no big deal?
Why don't we believe that these corporations would rather pump their food full of artificial filler and make more profit, than give us the real thing?
Why are we so gullible??
I have a video that I just recently watched on YouTube that was pretty unsettling to me...
If you wached it, you'll see why it disturbs me...
It's a shame that we're so wired to eating these things that we don't even care what they're made of, let alone what they're doing to us. It's actually coming to a point where a kid will know the taste of a chicken nugget before they know what spinach tastes like.
We all need to learn that food in it's natural form will ALWAYS be better for us than food from a package. It doesn't matter if it says "Low fat," "High in fiber," or "diet" on the label, if it isn't from God's green Earth, it's not supposed to be in your body.
So, I went to the produce store and saw that they had coconuts for $1 and OF COURSE I had to buy one! I think the most challenging thing about this whole operation was removing the meat from the shell, but other than that the process was fairly simple.
Crack the coconut and reserve the water from the coconut in a bowl.
Strain the water through a cheesecloth to remove any shell fragments and put water in blender.
Remove all the meat you can from the shell and rinse it off to remove any more shell fragments. you don't want any shell (brown stuff) left on the meat (white stuff)
Place all the meat into the blender and blend on low speed for 1 min and then at top speed for 3 mins.
(OPTIONAL: Add about 2 C. warm water to mixture as it's blending to thin it out)
Take a cheesecloth and spread over the top of a very large bowl.
Pour mixture onto cheesecloth slowly, ensuring that no meat gets into the milk. Wring out the milk from the mixture and store in a sanitized bottle/jar.
Let the mixture cool FULLY before placing the lid/cap on.
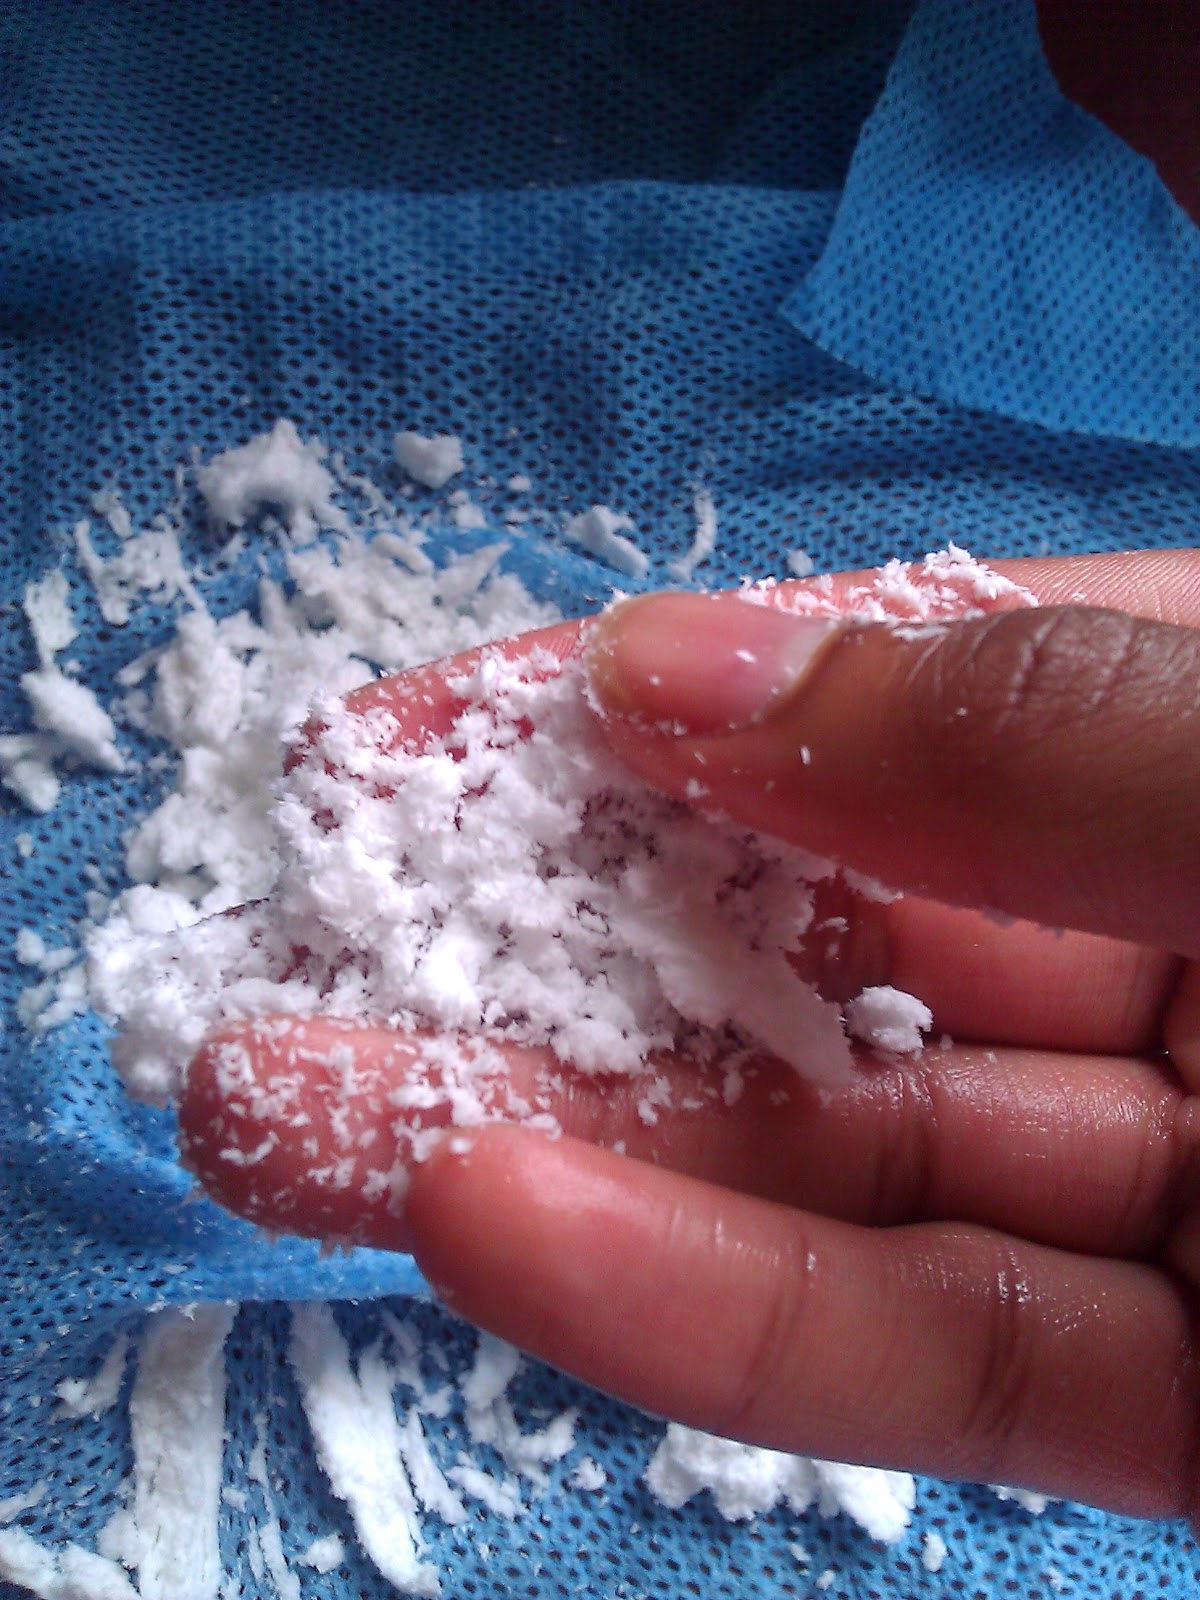
It felt like powder...and had NO flavor.
Coconut fragments (left), Coconut milk (right)
TADA!!!Coconut milk at your fingertips!
The coconut fragments that were left were very powdery and tasteless. I had the brilliant idea to try and toast them...but that didn't do anything. -__- The milk lasted me longer than i had expected..about two weeks to be exact. I drank it, i used it on my cereal, I used it in some curry, I even used the fat solids that rise to the top for a deep conditioner! *sighs* so many uses...so little time. ;)
Some health benefits of coconut milk, according to Livestrong.com, are:
I challenged my boyfriend to this workout and it WHOOPED. HIS. BUTT. And he's athletic! Hahaha! =D
I will admit that it's WAAY more strenuous than the daily workouts I posted before, but well worth the effort.
You'll feel yourself getting stronger ALONG with losing the inches...and when combined with healthy eating, you should be working your way to your perfect body in NO time.
If you find yourself getting winded or light headed, don't force yourself- take a 1 min break and drink some water...but be sure to get back to it! I suggest setting your timer on your phone for 60 secs so that you don't take too long of a break. ;)
At the beginning of the month, my family and I had our family reunion in Myrtle Beach and let me tell you, I had already worn this thing about 3 times before then!! Never in my wildest dreams did I ever think I'd actually have the confidence to wear a bikini!! My friends have always told me, "Oh, you're not that big! You can wear a bikini!" and I'd be sitting there like -_________- Really. Wearing a bikini isn't about the physical, it's ALL about the mental. If you don't feel good in a bikini, you won't look good in a bikini..and that pretty much works in all aspects of life. I'm just thankful to actually have the confidence to feel comfortable even WITH my stretch marks & cellulite, I DON'T CARE!!
While we were in Myrtle Beach I managed to get in a few good workouts in between all the eating out, BBQs, hearty cooking & beer! I would power walk down our block and jog up the block where the beach was (yeah, we were a block away from the beach). Each morning I went out, I would always go walk on the beach when I was done...it was almost like HEAVEN. I've always dreamt of bein able to wake up, workout and go to the beach and relax and then come home to my big master bedroom that overlooks the ocean and take a bath in my porcelain tub...*sighs*
...but I digress.
I took this picture on our last morning here, and I almost cried at how beautiful and good God is to give us these simple pleasures. I walked a good two miles down the beach before I decided that it was time for me to head back to the house..I really didn't want to, but I had no choice. =(
Apart from the fact that it had to end, my Family reunion was a BLAST. Our house was gorgeous and the beach was breathtaking. *sighs* if only it could have lasted forever....
This recipe is for the ones who leave bananas there to rot cause they think they've gone bad cause they're all brown and stuff...yeah. This recipe is for you. I had these two bananas left over that I didn't use for the banana cake I made the other day, and they were just sitting there gettin all brown and sad so I decided to take them and make fritters!
I must warn you, I'm not really a "measurer"..I kinda just go off of my eye. I pretty much know this by heart because my grandma use to make them all the time...BUT I do have a recipe for you guys to follow so, HERE WE GO!
What you'll need :
2-3 Bananas
2 tsp. Vanilla Extract
1 tsp. Ground Cinnamon
1/2 C. Sugar *I used cane sugar but regular sugar should be just fine*
1 tbsp. Baking Powder
1 tsp. Salt
1 egg *optional*
3 C. Veg oil for frying
Tools Needed
Deep pan
Fork
Spoon
Bowl
Measuring spoons
Measuring Cups
Slotted spoon
A plate w/ paper towels or a brown paper bag for draining.
Directions:
First, you want to heat the oil over medium-high heat. You want the oil to reach at least 325 - 350degrees F. for the fritters to fry properly..
Next, you want to peel your bananas and place them in the bowl. Now, at this point, I like to just add everything but the flour and baking powder before I mash them to incorporate more flavor...
...take fork and mash until no large pieces are left.
Then you want to add the baking powder and stir in...
...and lastly the flour. I add the flour a lil bit at a time until it reaches the desired consistency.
I like it to be thick enough to slide off the fork, but isn't runny. It needs to be the consistency of..oatmeal.
See how it sticks to the fork?
Next, take a considerable amount of the mixture into your spoon, about 3/4 of the way full...
...hold the spoon directly over the heat and let the mixture slide off the spoon into the oil.
Let it fry for about 1 minute to set and then, using your slotted spoon, scrape the bottom of the fritter so that it's not stuck to the bottom of the pan. Let it fry for another 2-3 minutes.
Using your slotted spoon, kinda lift the fritter and peek at the bottom to see if it's golden brown. If it is, flip it over. If not, let it fry a lil bit longer but make sure you don't burn it.
This is the color you're lookin for...
Once the other side is brown as well, you want to take your slotted spoon, remove the fritter, and place it on your paper towels to drain.
We have a lot of paper bags lying around from Shoprite and the Chinese food store, so I like to use them to help sop up the oil when I'm frying foods.
I tear it in half and place the top half into the bottom of the bag, and line it with a few napkins and/or paper towels.
It's simple AND cheap. Another thing I use is news paper w/ a couple paper towels on top.
Now, some people like to dust the fritters with powdered sugar, but they don't usually last long enough around here to require all of that. lol
The only thing left to do now is DIG IN! *once they've cooled, of course*