Friday, June 8, 2012

Yum Yums: Banana Fritters Pictorial!

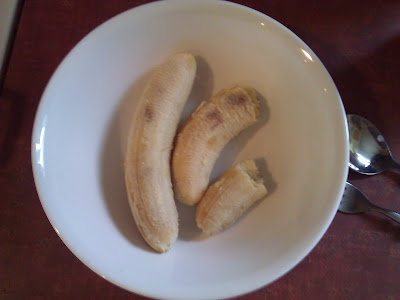
This recipe is for the ones who leave bananas there to rot cause they think they've gone bad cause they're all brown and stuff...yeah. This recipe is for you. I had these two bananas left over that I didn't use for the banana cake I made the other day, and they were just sitting there gettin all brown and sad so I decided to take them and make fritters!
I must warn you, I'm not really a "measurer"..I kinda just go off of my eye. I pretty much know this by heart because my grandma use to make them all the time...BUT I do have a recipe for you guys to follow so, HERE WE GO!

What you'll need :
  • 2-3 Bananas
  • 2 tsp. Vanilla Extract
  • 1 tsp. Ground Cinnamon
  • 1/2 C. Sugar *I used cane sugar but regular sugar should be just fine*
  • 1 tbsp. Baking Powder
  • 1 tsp. Salt
  • 1 egg *optional*
  • 3 C. Veg oil for frying
 
Tools Needed
  • Deep pan
  • Fork
  • Spoon
  • Bowl
  • Measuring spoons
  • Measuring Cups
  • Slotted spoon
  • A plate w/ paper towels or a brown paper bag for draining.


 Directions:

 First, you want to heat the oil over medium-high heat. You want the oil to reach at least 325 - 350degrees F. for the fritters to fry properly..

Next, you want to peel your bananas and place them in the bowl. Now, at this point, I like to just add everything but the flour and baking powder before I mash them to incorporate more flavor...

...take fork and mash until no large pieces are left.

Then you want to add the baking powder and stir in...

...and lastly the flour. I add the flour a lil bit at a time until it reaches the desired consistency.


I like it to be thick enough to slide off the fork, but isn't runny. It needs to be the consistency of..oatmeal.
See how it sticks to the fork?
Next, take a considerable amount of the mixture into your spoon, about 3/4 of the way full...

...hold the spoon directly over the heat and let the mixture slide off the spoon into the oil.
Let it fry for about 1 minute to set and then, using your slotted spoon, scrape the bottom of the fritter so that it's not stuck to the bottom of the pan. Let it fry for another 2-3 minutes.

 
Using your slotted spoon, kinda lift the fritter and peek at the bottom to see if it's golden brown. If it is, flip it over. If not, let it fry a lil bit longer but make sure you don't burn it.
This is the color you're lookin for...
 Once the other side is brown as well, you want to take your slotted spoon, remove the fritter, and place it on your paper towels to drain.


 We have a lot of paper bags lying around from Shoprite and the Chinese food store, so I like to use them to help sop up the oil when I'm frying foods. 

I tear it in half and place the top half into the bottom of the bag, and line it with a few napkins and/or paper towels.
It's simple AND cheap. Another thing I use is news paper w/ a couple paper towels on top.

Now, some people like to dust the fritters with powdered sugar, but they don't usually last long enough around here to require all of that. lol 

The only thing left to do now is DIG IN! *once they've cooled, of course*

ENJOY!
=D

Yum Yums: Produce Splurge


Went to the produce and the meat store & stocked up.
All of this stuff was only $20..and they basically sell in bulk, which is why I LOOOVE our produce store!
At the produce store I got a bag of onions, 3 bunches of scallions, a coconut, 2 containers of blackberries, a bag of potatoes, a bag of sugar snap peas, 2 avocados, a container of strawberries.
At the meat store I got the chicken, sour cream, apple cider vinegar, 2 cans of coconut milk and a couple of seasonings.


Yall should have seen the acrobatics I had to perform to carry that tote bag home cause when I tell you, that thing was HEAVY! I didn't drive over there because #1: it's only 4 blocks away &
#2: mommy had the car.
When I got home, my back was sore and my arms were tired...but I MADE IT.


Anyway....


This beauty ->>>
was only $4.20 *I'm pretty sure you peeped the price*
which I'm guessing would price it at about 25cents per lb which is NOT bad AT ALL. I took this chicken and hooked it UP! But that's a whole other post...;)


I'm sort of having a love affair with blackberries. I don't know what it is about them, but I just can't get enough. I guess that's good cause they're very high in antioxidants and polyphenols which help prevent cancers ( breast, cervical, etc) and heart disease. Plus, it contains high amounts of fiber as well to prevent intestinal disease & diabetes.More info


I GOT A COCONUT!!
I've never opened a brown coconut before; I only have experience w/ green ones. I honestly only bought this just to open it...but I DO plan on using it in something, I just don't know what yet. lol

O.O.T.D =)

Tube top scarves!


Scarf #1 side

Scarf #1 back
A few days ago I was unpacking my stuff from school and because of my extremely short attention span, I got bored. Hahaha!So I took a break and started watching stuff on YouTube, and in my favorites I had some D.I.Y t-shirt and tank top videos saved. I didn't really feel like cuttin any t-shirts up at the moment since that would've caused MORE mess to clean up, so I decided to try and make some tube tops with my scarves! One of my scarves (scarf #1) actually has a similar print to a tube top that I saw in Body Central that I wanted...but I refuse to pay $19.99 for some lil tube top soo, yeah. They came out surprisingly cute; I DEFINITELY plan on wearing them this summer!

Scarf #1 front
Scarf #2


Scarf #2 back

Scarf #2 front

Scarf #3 front

Scarf #3 back

Scarf #3 side *don't mind my mess* lol

Saturday, May 26, 2012

Homemade Aloe Conditioner Pictorial!

My big BEAUTIFUL aloe plant!
Yesterday, while I was making my flax seed gel, I got the 'brilliant' idea to try and make my own conditioner! I've really been thinking about giving store-brought hair products a rest, because I always have the problem of it either not doing much for my hair or breaking out my skin. Since the bentonite clay masks I've been doin on my face is working SOOO good, I do not wanna jeopardize my progress.
 I was kinda tired of doing the age-old mayonnaise treatment...and even MORE tired of just mixing eggs in my regular conditioner, so I looked around in the fridge & cabinets and looked at my aloe plant and said, "hmm, I wonder..." *rubs hands together mischievously * =)
Let me tell you, IMMEDIATELY my hair LOVED it! It left it so moisturized and soft- my scalp is clean and my hair is shiny! Aloe is great for many things- it heals the scalp (dandruff, burns, chemical scars) and moisturizes the hair itself. Mind you, the recipe is pretty runny, so i advise applying it to your hair over the sink or in the shower. 
 So, HERE IT GOES!! My recipe is kind of hefty because I have alot of hair, but you can easily reduce the amount to fit your hair length.

Ingredients you'll need:

2 fresh aloe leaves (size/ amount of leaf depends on length of hair)
1/2 lemon
4 tbsp honey
2 tbsp olive oil (or any oil of your choosing)

Tools you'll need:
Knife
Cutting board
Food processor or blender
Spoon
Measuring spoons (optional)
Small strainer
Container to put it in


The FIRST thing I did was go to my aloe plant and cut two nice sized leaves off. (Only one is pictured throughout pictorial)
I chose one that was beat up...

Cut the leaf into 3 (or 4) smaller sections so that it's easier to handle...
..don't forget to de-seed your lemon!


Then, using your knife, cut the sharp sides of, going vertically, from the top of the leaf to the bottom...
...this is what you're looking for.


Take your knife, again,  and cut the leaf in half...
Leaf cut in half


Next, over your food processor, take your spoon and scoop/scrape both halves of the leaf, getting all (and I do mean ALL) of the gel out. Be careful because it DOES get slippery!
THIS is that GOOD stuff!!


This is how much I got out of one section of the leaf...

Repeat that process for all sections.

This is how much I got out of the whole leaf..
After a WHOLE BUNCH of scooping and scraping!


Next, squeeze your lemon into the processor...

...add your honey and oil.


Cover the processor, and blend. I had to let it blend for a while cause, as you see, I have a teeny lil processor and there was still a bit of chunks left in the mixture.
Aloe chunks

Once it is finished, there should be a minimal amount of lumps left in the mixture..and the consistency will resemble beaten eggs.


Straining is optional, but I did cause i wanted to try and process the chunks some more.


And that's it!


I applied it to my hair in sections and finger de-tangled while I was in the shower, left it in my hair while I washed up and shaved- about 10-15 mins and rinsed it with a bearable temperature of cold water. I found that while I was detangling, it gave me GREAT slip! *sighs* This conditioner is just so wonderful in so many ways...lol!

The lemon acts as an additional cleanser, along with keeping the aloe preserved. This mixture should last you up to a month, but I would only make enough that I need for the day I'm conditioning my hair.

There are so many things I still want to do with this recipe, and once I try them, I will definitely get back to you guys! But I hope you love this conditioner as much as my hair did!
=)

Friday, May 18, 2012

Brief Hiatus...but I'm back! =D


Sorry for disappearing off the face of the Earth, but as we ALL know..college students just went through finals week and I was NOT about to be having any additional distractions!
I am OFFICIALLY moved out [YAY!]
...and will officially be a Junior once I return in the fall! [DOUBLE YAY!]
To all my fellow college students, whether young or old, give yourself a pat on the back because you deserve it. The fact that we made it through another year (or our first year) is definitely an accomplishment even if you feel as though this wasn't your best year, academically. You should be proud of everything you've done and, furthermore, strive to do BETTER next year.

A special congratulations to all those who graduated!!!
You should feel so proud of your-self/loved ones who made it! Have fun out there in the real world; I'll be joining y'all soon! 

So, my summer FINALLY begins-new styles, fitness and HOPEFULLY some freaking food posts will be coming your way!

XOXOXOXO
-FitFluffyFood